Network-Attached Storage, commonly referred to as NAS, is a type of storage solution that provides centralized data storage and access to multiple devices over a network, such as a local area network (LAN) or the Internet. It is a specialized file-level data storage device that allows users to store and share files, documents, media, and other data with wireless networks. Using Raspberry Pi, you can connect your existing storage devices which are accessible from anywhere in the world.
In this article, we build our Own Raspberry Pi NAS Server using Samba which is accessible from Windows, Linux, and Android devices.
Hardware Requirements for NAS Server
- Raspberry Pi
- USB cable
- microSD card
- External storage
- Ethernet cable
Build Your Own Raspberry Pi NAS Server
Install Raspberry Pi OS
To install Raspberry Pi OS on a microSD card, you’ll need a computer with an SD card reader. Here, we are using Raspberry Pi Imager to install Raspberry Pi OS onto your microSD card.
To download the Raspberry Pi Image, visit the official Raspberry Pi website by clicking here and downloading the latest version of Raspberry Pi OS.
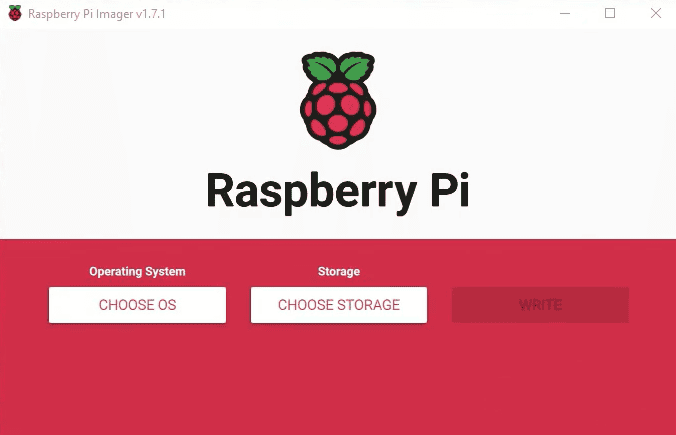
Open the Imager application and connect your microSD card to your PC using an SD card adapter. We recommend a minimum storage size of 32GB.
Install Raspberry Pi OS to your microSD card
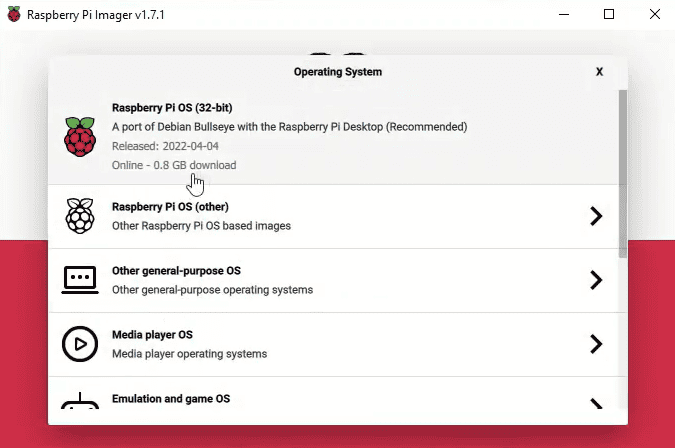
In Raspberry Pi Imager choose OS Raspberry Pi OS (32-bit).
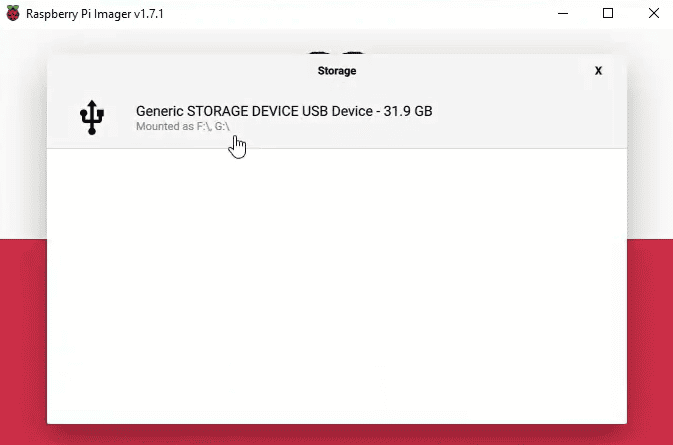
Choose Storage
Select your microSD card.
Enable SSH
Click the Advanced button, check the Enable SSH box, and set a username and password. You’ll need these to access your Raspberry Pi.
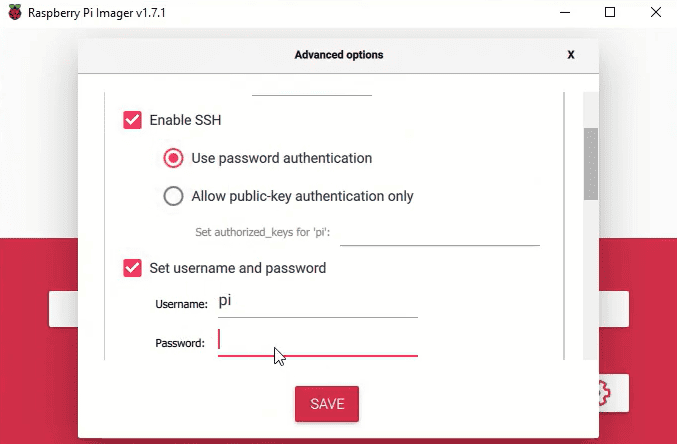
Select save to close the advanced button.
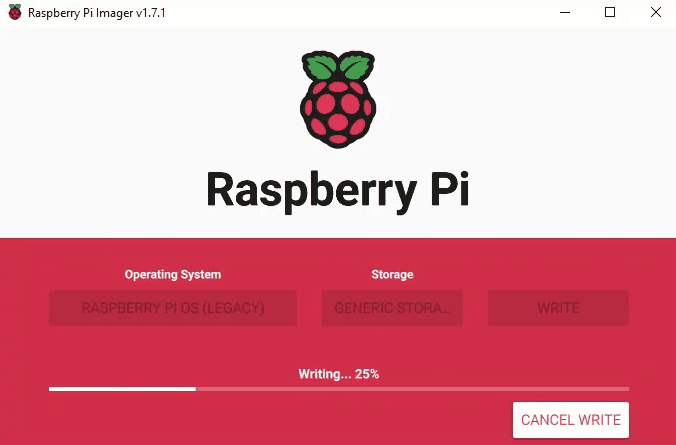
Finally, select Write.
Setting up your Raspberry Pi
Your Raspberry Pi needs to be connected to your network via an Ethernet cable to your router. Once connected, attach your data storage device to your Raspberry Pi. Lastly, connect your Raspberry Pi to the main power via a USB cable.
Retrieving your Raspberry Pi IP address
In order to access your Raspberry Pi via SSH from your PC, you’re going to need the Raspberry Pi’s IP address. The best way to find Raspberry Pi IP is to access your home router and check that the Raspberry Pi is connected via Ethernet (LAN). The login details for accessing your router should be printed on the back side of your router or you will be able to find them on the website of the router’s manufacturer. After login to your router, you will find the IP address of your Raspberry Pi.
Also Read: What is OpenSSL? and How to Install OpenSSL 3 on Ubuntu 22.04
Connect Raspberry Pi via SSH
Open Windows PowerShell on your computer and run the following, replacing “pi” with your previously chosen username, and XXX.XXX.X.X with your Raspberry Pi’s IP address to access it:
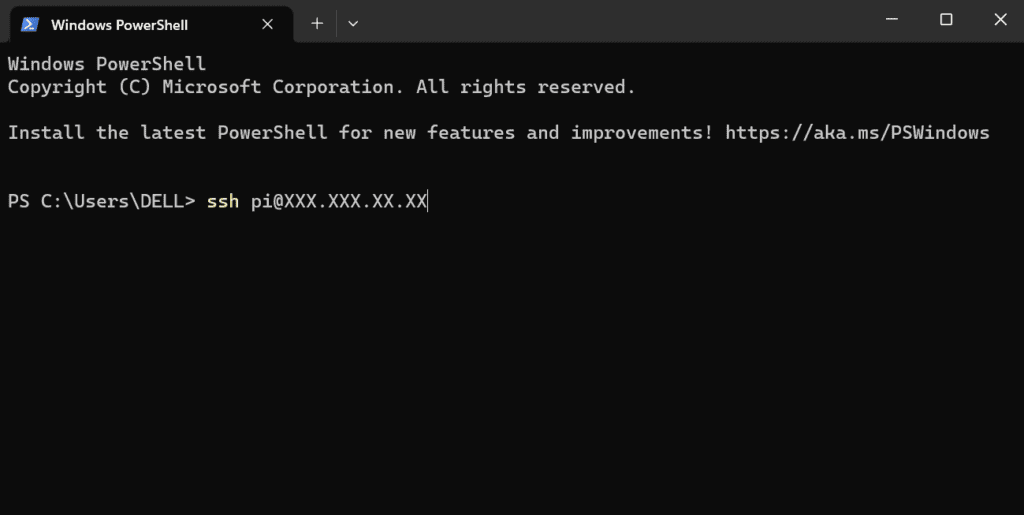
When asked for your password, use the password you created in Raspberry Pi Imager.
Setting up Samba Server on your Raspberry Pi
To install the Samba Server on Raspberry Pi, use the following steps and run the following commands:
Step 1: We can update the package and verify all the necessary dependencies are installed by running the following commands.
sudo apt-get update && sudo apt-get upgrade
Step 2: Install the Samba package
sudo apt install samba
Step 3: To check where is samba
whereis samba
Step 4: Install tools for different file system
sudo apt install exfat-utils exfat-fuse ntfs-3g
Step 5: To check disk is connected to your Raspberry Pi
sudo lsblk

Step 6: Unmount your disk
sudo unmount -R /media/pi/"Ultra Touch"
Step 7: Create a new folder for Samba
mkdir /home/pi/NAS
Step 8: Change a directory owner
sudo chown -R root:users /home/pi/NAS/
Step 9: Set permission
sudo chmod -R ug=rwx, o=rw /home/pi/NAS/
Step 10: To mount your disk to your Raspberry Pi
sudo mount /dev/sda1 /home/pi/NAS
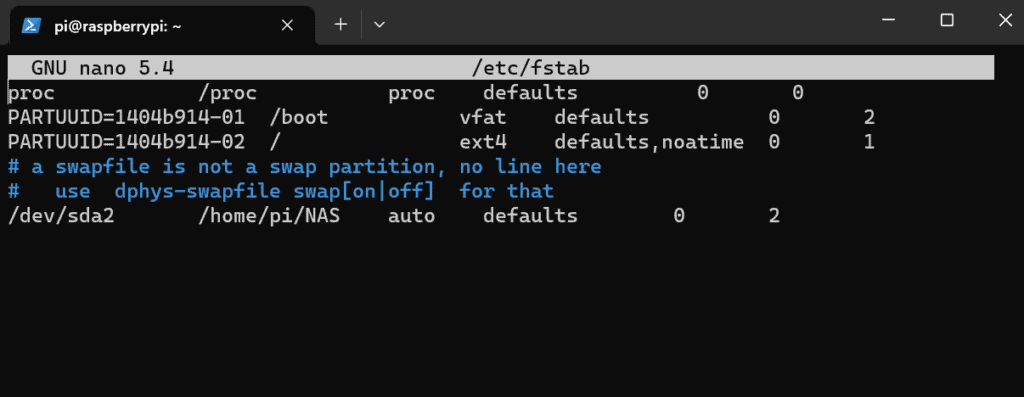
Step 11: Set the drive to auto-mount when your raspberry pi restart
To open and edit the fstab file
sudo nano /etc/fstab
Add the following
/dev/sda1 /home/pi/NAS auto defaults 0 2
Configuring Samba Server
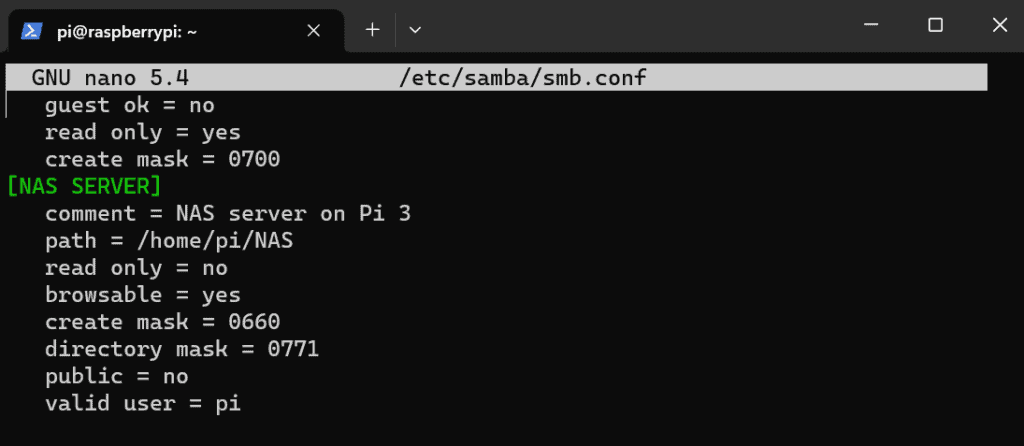
Step 1: To open and edit the “smb.conf” file
sudo nano /etc/samba/smb.conf
Add the following
[NAS SERVER]
comment = NAS Server on Pi 3
path = /home/pi/NAS
read only = no
browsable = yes
create mask = 0660
directory mask = 0771
public = no
valid user = pi
Step 2: Create a user
sudo useradd -m -G users pi
Step 3: Set a password
sudo passwd pi
Step 4: Add user to Samba
sudo smbpasswd -a pi
Step 5: To restart a samba service
sudo service smbd restart
sudo service nmbd restart
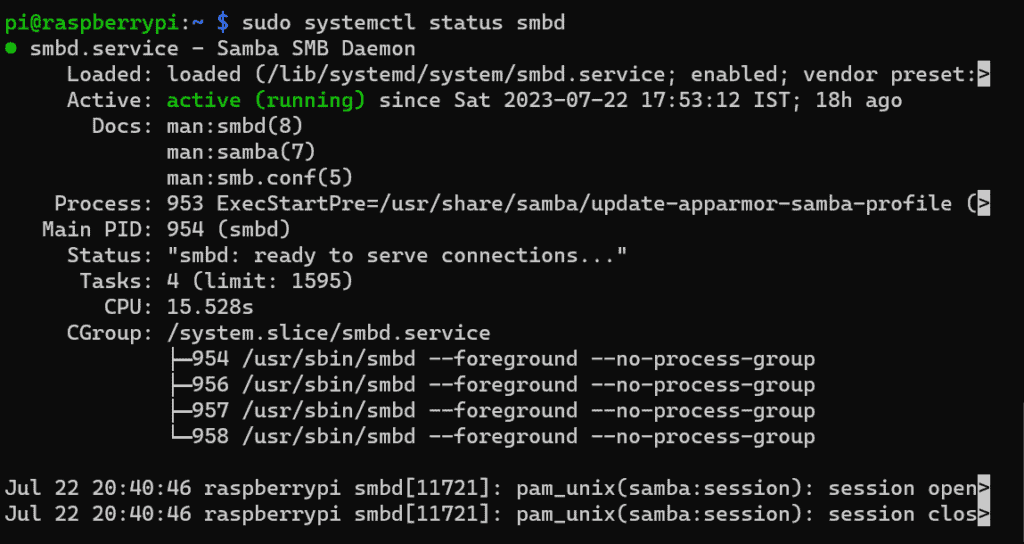
Step 6: You can also check the status of the Samba server on your Raspberry Pi using the following command.
sudo systemctl status smbd
Note: Setting up a static IP address on Raspberry Pi is necessary by ensuring the device’s private IP address does not change. You can check below to setup Static-IP address of Raspberry Pi.
Also Read: How to Set-up a Static IP Address for Raspberry Pi?
Accessing your Raspberry Pi Samba Server on Windows
On Windows OS, you can use the following steps to access the Raspberry Pi directory.
Step 1: Open your File Explorer
Step 2: Type your Raspberry Pi IP address as highlighted in the image below and click enter.
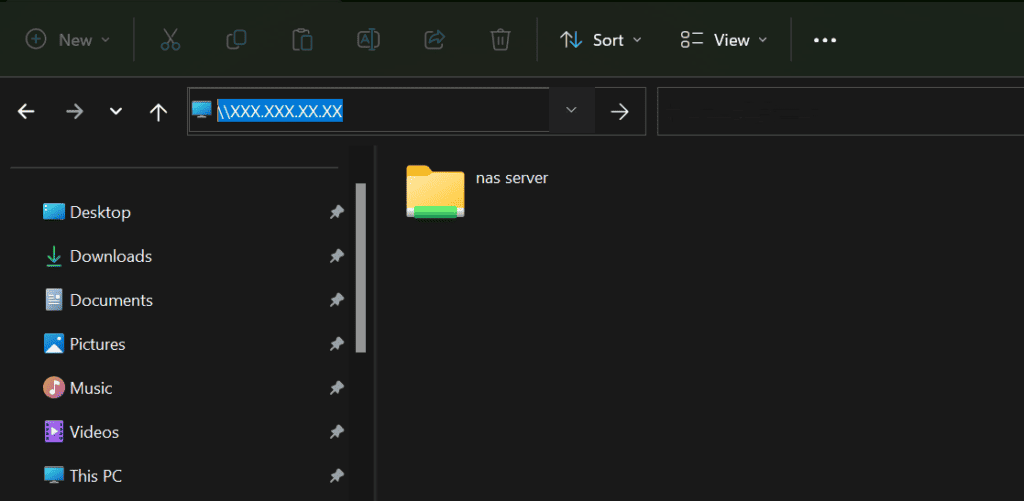
Step 3: Right-click on the NAS server and click on Map Network Drive
Step 4: The above step will open the “Map Network Drive” window on your screen, click on the “Finish” option:
Performing the above step will open the network credentials on your system screen and you have to provide your Raspberry Pi username and password and click OK.
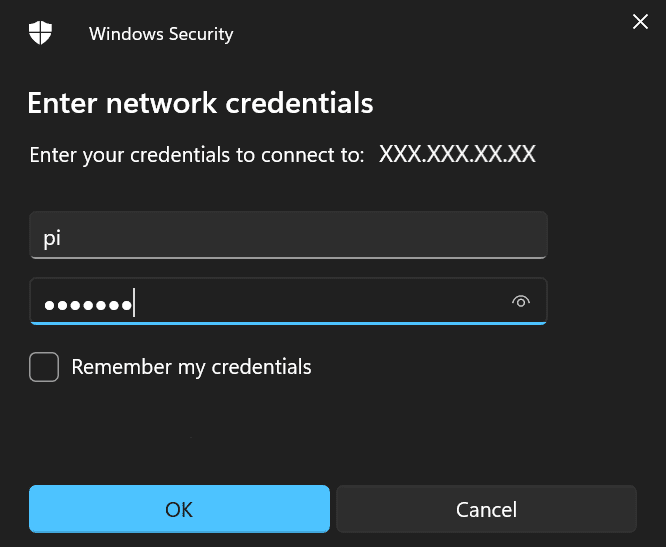
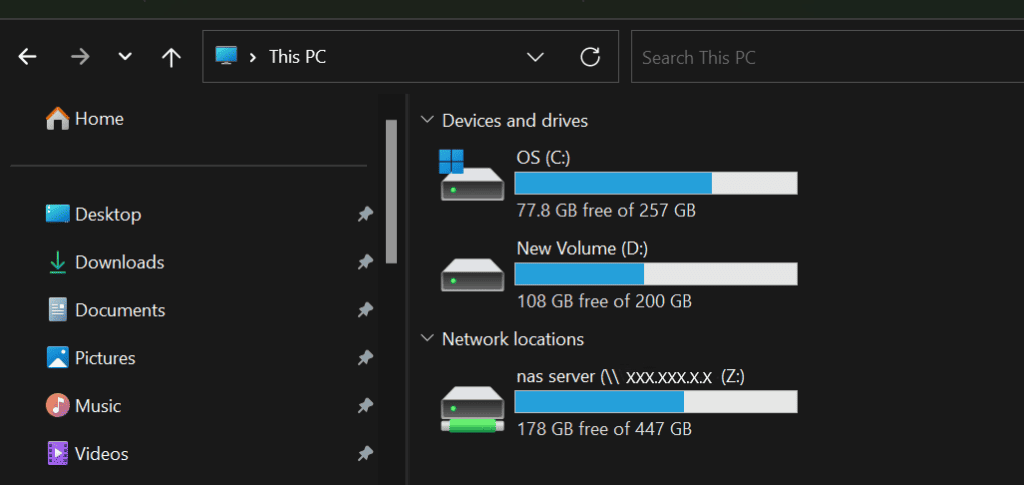
Now, you should see the Raspberry Pi directory listed under This PC in your File Explorer in the “Network locations” option. You can now access and use it just like your local drive.
Accessing your Raspberry Pi Samba Server on Linux (Ubuntu)
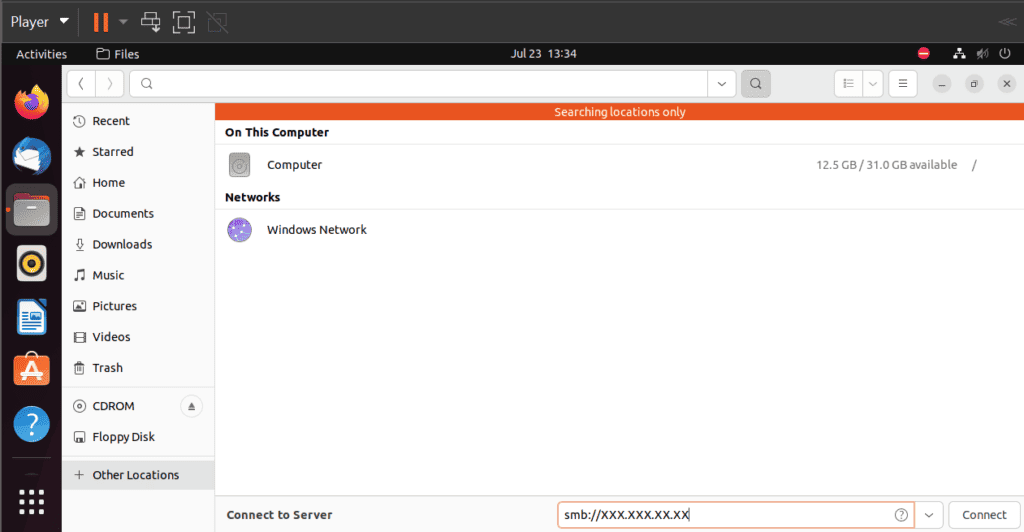
Step 1: Open Files and select Other Locations from the list on the left and enter the Raspberry Pi IP address in the text field in the bottom right and click Connect.
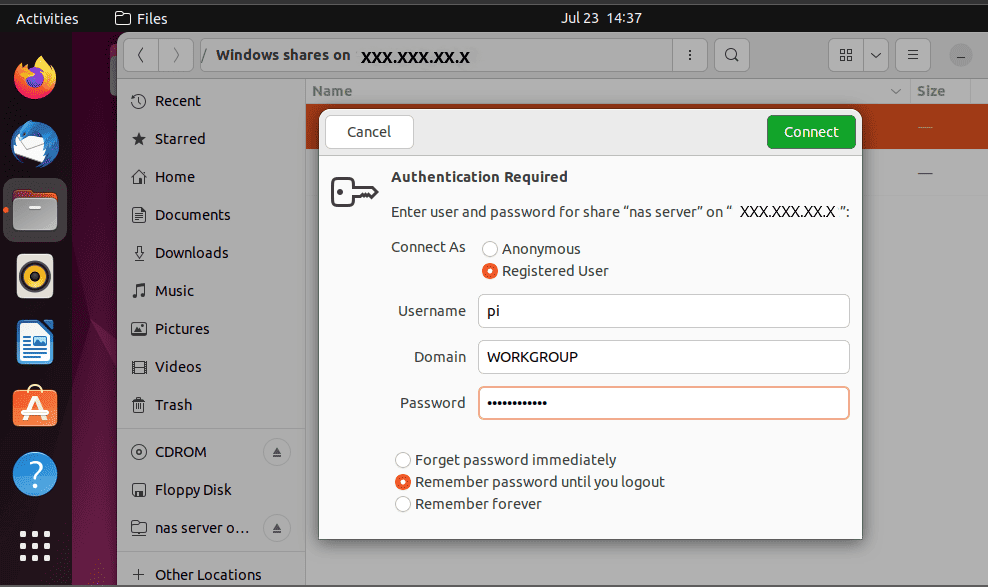
Step 2: Select Connect As Registered User, enter your username and your password, and click Connect.
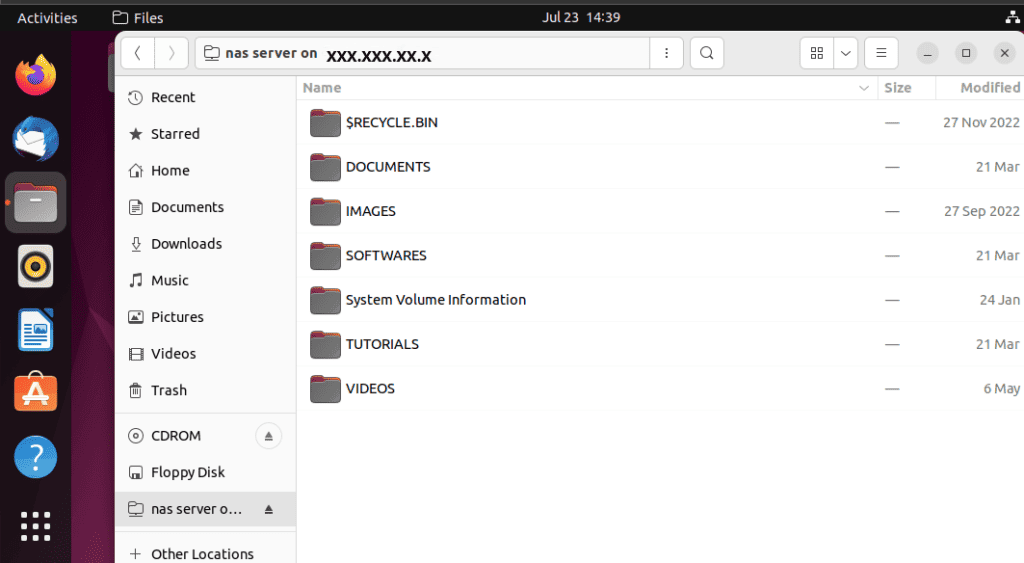
Now, your Raspberry Pi directory should appear in the sidebar of your Files window.
Accessing your Raspberry Pi Samba Server on Android
Step 1: Open Play Store and download the File Manager App.
Step 2: Click Remote and Add a remote location
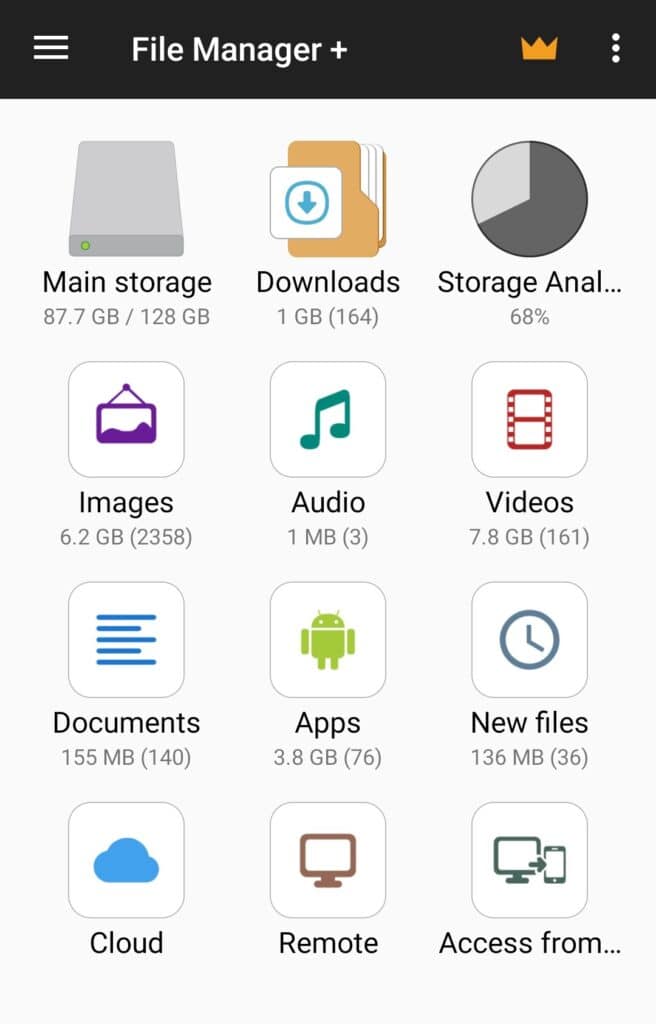
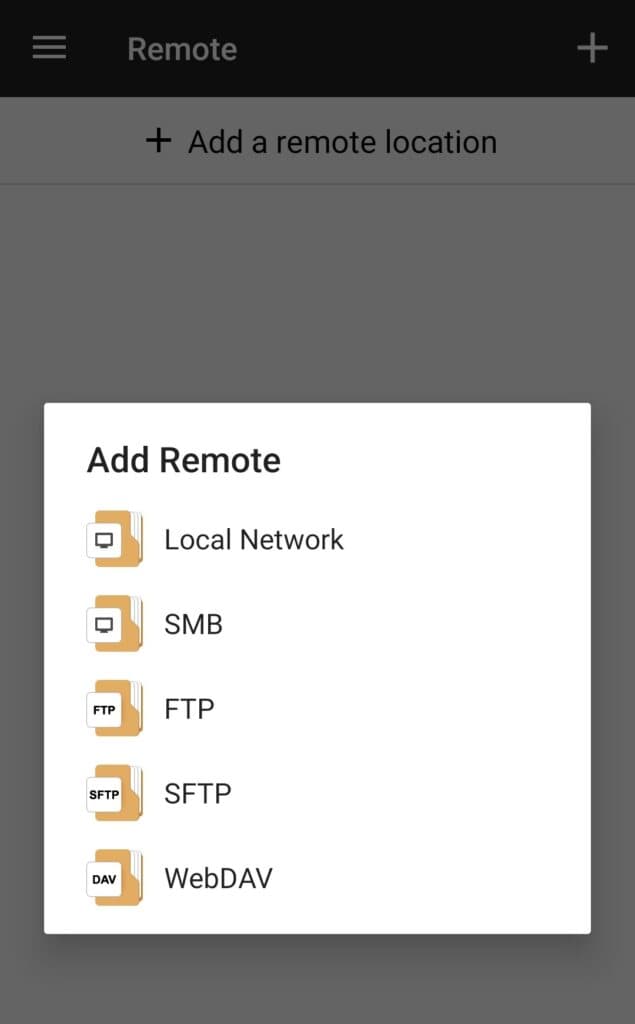
Step 3: The above step will open the “Add Remote” window on your screen, click on the “SMB” option:
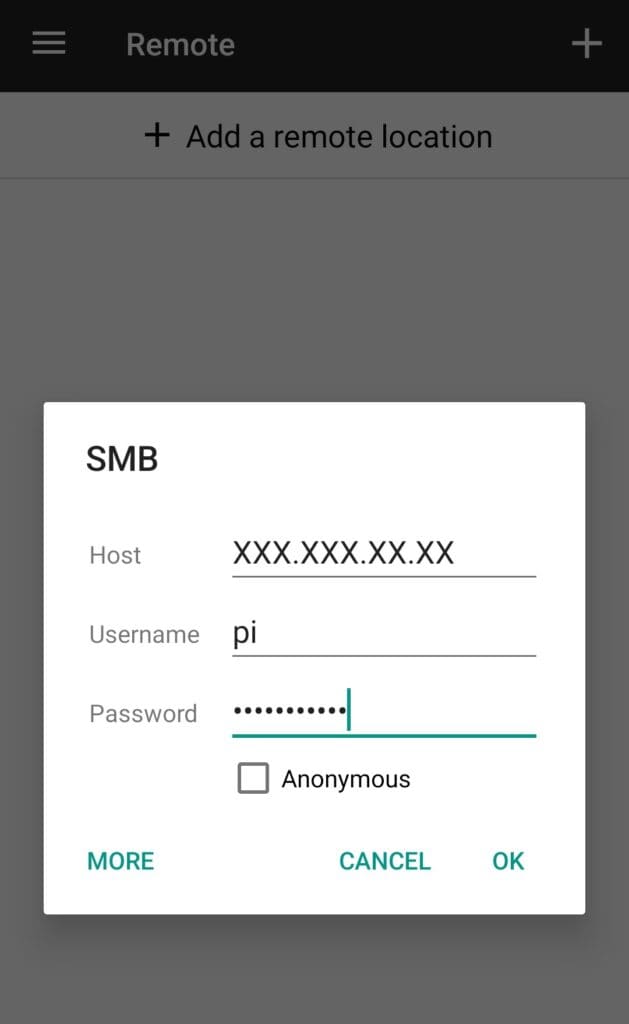
Step 4: You have to provide your Raspberry Pi IP address, username, and password and click OK.
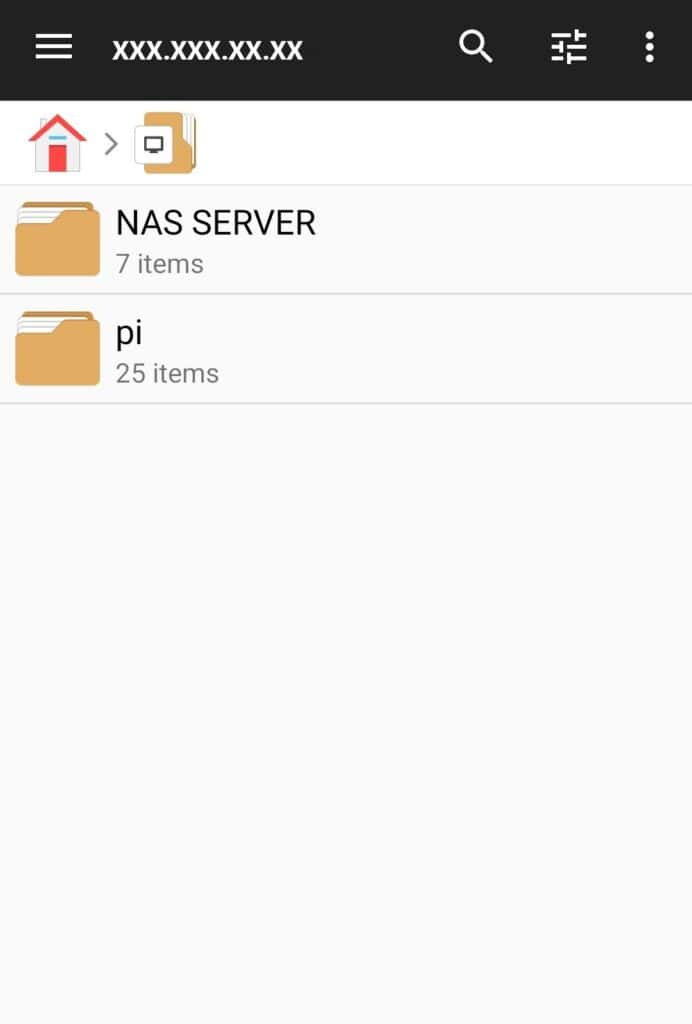
Now, your Raspberry Pi directory should appear in the file manager.
Also Read: What Is Raspberry Pi And Sense HAT


Be the first to comment